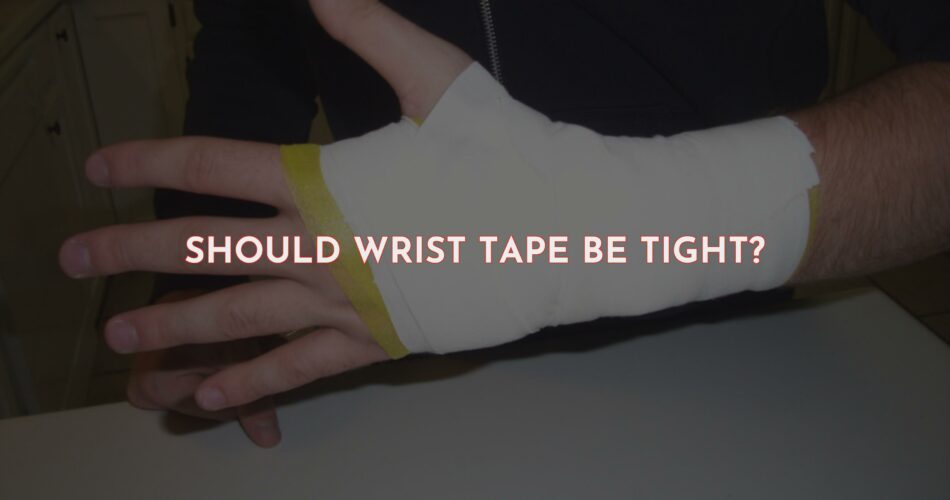
Should Wrist Tape Be Tight? – Do you have weak wrists? Are you considering taping them for support? Taping a weak wrist can provide additional structural support and stability, but is it necessary to pull the tape tight? The answer to this question is not as straightforward as you might think.
In this blog post, we will discuss why you should be careful when taping a weak wrist and provide tips for taping your wrists safely and effectively. We will also discuss the benefits and drawbacks of taping, as well as alternatives to taping that may provide better support.
Taping a wrist can be beneficial, especially if you suffer from pain or instability in the wrist. However, it is important to understand the potential risks associated with taping your wrist too tightly. Too much pressure on the veins and nerves that pass through the area can affect blood circulation and sensation in the hand and fingers, leading to further injury.
So, should wrist tape be tight? We will answer this question and more in this blog post. We will provide helpful tips and advice on taping your wrist, as well as discuss the pros and cons of taping. Keep reading to learn more!
should wrist tape be tight?
Wrist tape is a great way to protect the wrists from injury when doing activities such as weightlifting, gymnastics, and other sports. It supports the wrists, reduces stress on the joints, and helps to provide stability. However, it is important to ensure that the tape is not too tight.
Why is it important to ensure wrist tape isn’t too tight?
If wrist tape is too tight, it can cause a number of issues. It can restrict blood flow and circulation, leading to numbness, tingling, and pain in the hands and fingers. It can also put pressure on the veins and nerves that pass through the area under the skin to the hand and fingers. This can lead to further issues such as carpal tunnel syndrome.
How can you tell if wrist tape is too tight?
If you feel any discomfort or pain when the tape is applied, it is likely that it is too tight. You may also notice redness, swelling, and numbness in the area. If you experience any of these symptoms, it is important to remove the tape immediately and adjust it to a more comfortable fit.
What is the correct way to apply wrist tape?
The correct way to apply wrist tape is to wrap it lightly under the wrist. Note there is little tension on the tape. Then, start pulling the tape tight gradually as you go up the arm. Make sure you do not pull too tight or put too much pressure on the veins and nerves.
Tips for applying wrist tape
Make sure the tape is not too tight: As mentioned above, it is important to ensure that the tape is not too tight. If it is too tight, it can cause discomfort, pain, and even restrict blood circulation.
Use the correct tape: There are a variety of different tapes available for wrist support. It is important to choose the right one for your activity. For example, if you are weightlifting, you should use a tape that is designed for this purpose.
Make sure the tape is secure: When applying the tape, make sure it is secure and will not come undone during activity. This will ensure that your wrists are protected and supported.
Remove the tape after activity: After activity, it is important to remove the tape to ensure that your wrists are not restricted.
In conclusion, it is important to ensure that wrist tape is not too tight. If it is too tight, it can cause a number of issues such as numbness, tingling, and pain in the hands and fingers. To ensure that your wrists are supported and protected, make sure to use the correct tape, apply it correctly, and remove it after activity.
How do you tape weak wrists?
A Comprehensive Guide
Weak wrists can be a source of discomfort and pain for many people. They can also lead to other issues such as an inability to lift weights or perform certain activities. But with the right taping techniques, you can help support and protect your weak wrists. In this article, we’ll take a look at how to tape weak wrists and provide a comprehensive guide to the process.
What are Weak Wrist Taping Techniques?
Weak wrist taping techniques are designed to provide support and protection to the wrist joint. This can be done in a variety of ways, but the most common techniques involve using tape to provide support and stability to the wrist. The tape acts as a brace and helps to reduce the stress and strain on the joint.
Benefits of Weak Wrist Taping
The primary benefit of weak wrist taping is that it can provide support and stability to the joint. This can help reduce the pain associated with weak wrists and also help to reduce the risk of further injury. Additionally, taping can help improve the range of motion of the joint and help to improve the overall strength and stability of the wrist joint.
How to Tape Weak Wrists
The process of taping weak wrists is fairly straightforward, but it is important to follow the correct steps in order to ensure that the tape is properly applied. In general, the following steps should be followed when taping weak wrists:
Step 1: Clean and dry the area around the wrist.
Step 2: Cut the tape into strips of the desired length. The strips should be long enough to cover the entire wrist.
Step 3: Apply the tape to the wrist in an overlapping pattern. Start at the base of the wrist and work your way up the arm.
Step 4: Secure the tape in place with adhesive tape or clips.
Step 5: Check the tape for any sign of irritation or redness. If there is any irritation, remove the tape and apply a different type of tape.
Taping weak wrists can be an effective way to provide support and stability to the joint. By following the steps outlined above, you can help reduce the pain and discomfort associated with weak wrists and help to improve the overall strength and stability of the joint. If you have any questions or concerns about taping weak wrists, it is important to speak to a medical professional.
Does taping wrist help carpal tunnel?
Carpal tunnel syndrome is a painful condition that affects the wrists, hands and fingers. It is caused by pressure on the median nerve, which runs through the carpal tunnel at the base of the palm. Symptoms include tingling, numbness, and pain in the wrist and hand.
Many people are turning to tape as a way to alleviate the symptoms of carpal tunnel syndrome. But does taping wrist help carpal tunnel?
The answer is yes. Taping can help reduce the pressure on the median nerve and improve the symptoms of carpal tunnel. Taping is a simple, non-invasive treatment option that can be done at home.
How to Tape for Carpal Tunnel Syndrome
The goal of taping for carpal tunnel syndrome is to reduce pressure on the median nerve. To do this, tape should be applied in a way that opens the carpal tunnel. This can be done by wrapping a small amount of tape (like a band) around the wrist. The tape should be low-adhesive, stretchy, and not hurt during removal.
It is important to note that the tape should not be too tight. If it is too tight, it can cut off circulation and cause more harm than good.
Benefits of Taping for Carpal Tunnel Syndrome
Taping is a simple, non-invasive treatment option for carpal tunnel syndrome. It can be done at home, without the need for expensive medical treatments. Taping can help reduce the pain, tingling, and numbness associated with carpal tunnel syndrome.
Risks of Taping for Carpal Tunnel Syndrome
Taping should not be used as a replacement for medical treatment. If the symptoms of carpal tunnel syndrome persist or worsen, it is important to seek medical advice.
In addition, it is important to ensure that the tape is not too tight. If it is too tight, it can cut off circulation and cause more harm than good.
Taping can be an effective treatment for carpal tunnel syndrome. It is a simple, non-invasive treatment option that can be done at home. Taping can help reduce the pain, tingling, and numbness associated with carpal tunnel syndrome. However, it is important to ensure that the tape is not too tight, as this can cause more harm than good. If the symptoms of carpal tunnel syndrome persist or worsen, it is important to seek medical advice.
How do you tape an arthritic wrist?
An In-depth Guide
Taping an arthritic wrist can help reduce pain and protect the joint from further damage. Arthritis can cause swelling, stiffness, and pain in the wrists, making it difficult to use your hands for everyday activities. Taping can help provide support and stability to the area, allowing you to move more freely and reduce pain. If you have arthritis in your wrist, you may be wondering how to tape it properly. This guide will provide you with information on the best techniques for taping an arthritic wrist.
What Is The Purpose of Taping An Arthritic Wrist?
Taping an arthritic wrist can help provide support and stability to the joint, reducing pain and allowing you to move more freely. Taping can also help protect the joint from further damage, as arthritis can cause the cartilage to break down over time. Additionally, taping can help reduce inflammation in the area, which can reduce swelling and stiffness.
What Materials Do You Need to Tape An Arthritic Wrist?
The materials you need to tape an arthritic wrist will depend on the type of tape you choose. Generally, you’ll need the following items:
• Tape of your choice (athletic tape, kinesiology tape, etc.)
• Scissors
• Non-alcohol wipes
• Skin-friendly tape remover
How to Tape an Arthritic Wrist: Step-by-Step Guide
Taping an arthritic wrist can be done in a few easy steps. Follow these instructions to properly tape your wrist:
1. Start by cleaning the area with a non-alcohol wipe. This will help ensure that the tape sticks properly and won’t cause any irritation.
2. Cut the tape to the desired length and width. Make sure to leave enough tape to cover the entire area.
3. Apply the tape to the wrist, starting at the base of the thumb and wrapping around the wrist in a circular motion.
4. Secure the tape at the end by overlapping the ends of the tape.
5. Make sure the tape is not too tight or too loose.
6. Finally, use the tape remover to gently remove the tape when you are finished.
Tips for Taping an Arthritic Wrist
Taping an arthritic wrist can be tricky, so here are a few tips to keep in mind:
• Make sure to use a tape that is designed for use on the skin. Athletic tape and kinesiology tape are both good options.
• Avoid using tape that is too tight or too loose.
• If you experience any pain or discomfort when taping, stop and remove the tape.
• When removing the tape, make sure to use the tape remover. This will help prevent any skin irritation.
• Finally, make sure to check the area periodically to make sure the tape is still secure and not causing any irritation.
Taping an arthritic wrist can help reduce pain and protect the joint from further damage. While it may seem daunting at first, taping your wrist is a relatively simple process. By following the instructions and tips outlined above, you can ensure that you are taping your wrist correctly and safely.
How can I strengthen my loose wrists?
Having weak and loose wrists can be a major hindrance when it comes to lifting and everyday activities. Weak wrists can cause pain in the wrists and hands, as well as make it more difficult to perform tasks such as lifting weights. Fortunately, there are some simple exercises you can do to strengthen your wrists and reduce the risk of injury.
Wrist Flexion
The first exercise you can do to strengthen your wrists is wrist flexion. To perform this exercise, hold a weight with your palms facing down and your wrist hanging over the knee. Move your hand up as far as possible and then down as far as possible in a slow and controlled motion. Do a set of 10, then repeat. Repeat the exercise, but with your palms facing up.
Wrist Extension
The next exercise to strengthen your wrists is wrist extension. To perform this exercise, hold a weight with your palms facing up and your wrist hanging over the knee. Move your hand up as far as possible and then down as far as possible in a slow and controlled motion. Do a set of 10, then repeat. Repeat the exercise, but with your palms facing down.
Wrist Rotations
The final exercise to strengthen your wrists is wrist rotations. To perform this exercise, hold a weight in one hand and rotate your wrist in a circular motion. Make sure to keep your wrist straight and move in a slow and controlled motion. Do a set of 10, then switch hands and repeat.
Frequency
To get the maximum benefit from these exercises, it is important to do them regularly. Try to do the exercises at least 3 times per week. You can also increase the weight you are using, as long as you are comfortable with it.
Strengthening your wrists can help reduce the risk of injury and help you perform everyday tasks with more ease. The exercises outlined above are simple and can be done in the comfort of your own home. Remember to use proper form and to increase the weight as you become stronger. With regular practice, you will soon have strong and healthy wrists.
Why are my wrists so weak?
Weak wrists can be a source of discomfort and can interfere with everyday activities. If you’re experiencing weak wrists, it’s important to understand the potential causes and take measures to improve your strength and mobility.
What Causes Weak Wrists?
There are many potential causes of weak wrists, some of which require medical attention. Some of the most common causes of weak wrists are:
Carpal Tunnel: The carpal tunnel is a narrow passageway in the wrist that is surrounded by tendons, bones, and ligaments. If these tissues swell, they can compress the median nerve, resulting in pain, numbness, and tingling in the wrist and hand.
Pinched Nerve: A pinched nerve occurs when something presses against and irritates a nerve in the neck, shoulder, or arm. This can cause pain and weakness in the wrist.
Ganglion Cyst: A ganglion cyst is a fluid-filled sac that typically forms near a joint or tendon. These cysts can cause pain and weakness in the wrist.
Arthritis: Arthritis is a condition that affects the joints, including those in the wrist. It can cause pain, swelling, and stiffness in the wrist, which can lead to weakness.
Injury: An injury to the wrist can cause swelling, inflammation, and pain. This can lead to weakness in the wrist.
How Can I Strengthen My Wrists?
If you’re experiencing weak wrists, it’s important to take steps to improve your strength and mobility. Here are some tips to help you get started:
Exercise: Exercise can help to strengthen the muscles in the wrist and improve flexibility. Try exercises such as wrist curls, wrist extensions, and wrist circles.
Stretching: Stretching can help to improve flexibility and reduce tension in the wrist. Try stretching your wrists in all directions, and holding each stretch for 10-15 seconds.
Ice: Applying ice to the wrist can help to reduce inflammation and pain. Wrap an ice pack in a towel and apply it to the wrist for 15-20 minutes.
Rest: Resting the wrist can help to reduce inflammation and pain. Avoid activities that put strain on the wrist, such as typing or writing for extended periods of time.
Massage: Massage can help to reduce tension in the wrist and improve flexibility. Ask a massage therapist to focus on the wrist and forearm.
When Should I See a Doctor?
If you’re experiencing persistent pain or weakness in the wrist, it’s important to see a doctor. A doctor can diagnose the cause of your symptoms and recommend treatment options. They may also refer you to a physical therapist or occupational therapist for further treatment.
Weak wrists can be a source of discomfort and can interfere with everyday activities. If you’re experiencing weak wrists, it’s important to understand the potential causes and take measures to improve your strength and mobility. Common causes of weak wrists include carpal tunnel, pinched nerve, ganglion cyst, arthritis, and injury. To strengthen your wrists, try exercises, stretching, ice, rest, and massage. If your symptoms persist, it’s important to see a doctor for further evaluation and treatment.
Final thoughts
In conclusion, it is essential to understand the importance of secure, yet comfortable wrapping when taping the wrist. The tape should be wrapped lightly and pulled tight only when necessary to avoid any strain on the veins, nerves, and blood circulation in the area. With this in mind, it is possible to protect and support the wrist while still allowing for a full range of motion and optimal performance. Whether you are an athlete or someone recovering from an injury, it is important to take the necessary precautions when taping the wrist to ensure the best possible outcome.
FAQ
How do I know if I overused my wrist?
- pain, which may feel like burning, aching or throbbing.
- stiffness and weakness.
- tingling, pins-and-needles or numbness.
- muscle cramps.
- swelling.
How long should physical therapy tape stay on?
How do you tell if I have tendonitis in my wrist?
- Wrist pain where the arm meets the hand.
- Pain that radiates up to the elbow.
- Stiffness in the wrist joint.
- Reduced range of motion.
- Decreased grip strength.
- Tenderness in the wrist or forearm.
- Swelling.
- Creaking noise.
Comments